
Challenge accepted.
 Our bathroom is the smallest bathroom I've ever seen, and it is ALL ours. This wasn't an issue until the baby came the bathroom shrunk very quickly. I had to take action, I couldn't stand the tiny bathroom anymore and had to redecorate it, or "remodel" as I've been calling it.
 The first thing I wanted to do was to get some wall art for the bathroom. I had read that photos can make it look larger than what it is, and after seeing all the cute artwork on Pinterest, I was getting the itch and HAD to get some!
I found three frames I liked at Dollar Tree, one of them was a mirror even! I found the paint at Hobby Lobby for less than a dollar, costing me about $3.95 (including tax).
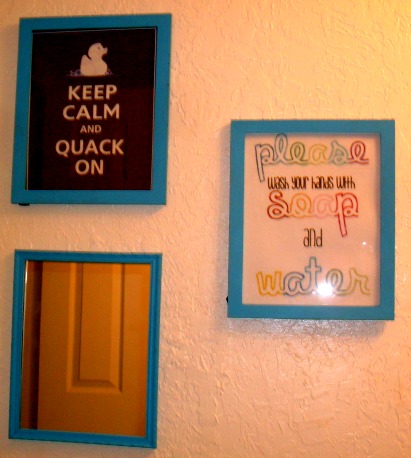
I went home and broke out the paint. It took about thirty minutes total for two coats and drying time. I went onto Pinterest and found some free artwork that I liked and printed it out and framed it. (BTW, I lost the pins that led to the websites so I could credit them, if you know who they are, will you let me know? I want to thank them and give credit!)
The next morning I got to hanging the photos up and taking a photo of them on the wall. I HATED taking the photos of this project because there is NO natural light anywhere near the bathroom (the nearest natural light is in the bedroom, but that's a pretty far distance considering).
It's always inspiring to see the beginning stages of a bathroom remodel, and your Part One update captures the excitement and hard work that goes into transforming a space. The progress you’ve made already shows great potential—the planning, demo work, and early design choices all reflect a thoughtful approach. Watching a room evolve from its original state into something more functional and stylish is such a rewarding experience. For those considering a remodel of their own, I suggest exploring r4remodelers. They offer expert remodeling services that can help turn your vision into a beautifully finished reality. Looking forward to the next update!
ReplyDelete