Tuesday, April 30, 2013

Sponsor This Workman Life!


We've got some ad spaces open just for you! Sponsor us this May - gain viewers, reach new blog readers and join us on all our crazy adventures! 

Now that I have your attention, here's some details:

We reach between 3500 - 5000 viewers PER MONTH!
The site we get the most clicks from is Pinterest.
We have 165 GFC followers. 
The most common searches for the blog from Google are, "This Workman Life" and "Map Nails"
Our ad spaces are VERY AFFORDABLE:


Buy today and I'll give you a whole 2nd month for FREE!
Hope to see you on our sidebar soon!

Monday, April 29, 2013

Makeup Monday: April Glam Bag

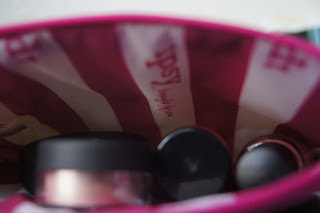
The April Glam bag came over my birthday weekend, and I was SO excited to get it! I had found a sneak peek online and found out the title of it was "Pretty in Pink." How perfect! Lets see what we've got this month...


Sation Nail Lacquer - Love at First Byte - retails at $6.99


Big Sexy Hair - Powder Play - retails at $8.99


MICA Beauty - Shimmer Powder - Earth - retails at $9.99


Be a Bombshell - Blush - Sweet Cheeks $16


Yaby eyeshadow - Seashell - $3.00


AND this super cute bag! I just love the makeup bags they come in. 

The thing I love about my IPSY subscription is that it is $10.00 a month, and inside it, I get FIVE fantastic pieces of makeup a month! Each month is totally worth it - this month I would've spent $44.97 for these items if I bought them myself! 
If you don't have an IPSY subscription, I highly suggest you do it! It is totally worth it! 

Friday, April 26, 2013

Scalloped Hasselback Potatoes


This recipe is inspired off of a Pinterest recipe, but again, I really just take the basic concept and do whatever I can to make it ours. Bubba really liked it, saying they were totally moist and delicious, and I LOVED how flaky the skin was on the potatoes!

What you'll need:
Potatoes (I did 2 big ones and a small one for little dude)
1 stick of butter (freeze it before hand)
Cheese (I used slices)
Shredded cheese
Parmesan Cheese
Sour Cream (Optional)

Step One: Clean your potatoes. Then, using a sharp knife, cut about 3/4 the way through it in slices.
Once cut, slice your butter and cheese and insert it into the slices, alternating between cheese and butter.
My butter melted as I was doing it, so I used my thumb and instead of letting it stick straight out, I rounded it off, shoving more into the slice. 
Bake at 400 degrees for 50 minutes. The oven will sound scary because of all of the butter, don't be like me and check the oven every ten seconds. It really is fine.

Step Two: Once cooked, remove from the oven and add shredded cheese. Return to the oven for another 15 minutes. 


Step Three: Remove from oven. Let sit for a moment, transfer to plate and add any extra toppings you like, such as sour cream, bacon bits, etc. They stayed warm through the whole meal, and we were pleasantly surprised with the end result!
(If you look at the pin I linked to, you'll see, I really didn't follow the instructions, so it is a miracle it worked out at all!)
Enjoy!

Thursday, April 25, 2013

How do you do Stella & Dot?


Stella & Dot is a fantastic brand, and I just love our local Rep, Caroline. She and I got into a discussion about how the Stella and Dot jewelry is for literally everyone, and can fit into any lifestyle. I was skeptical, so I took a Stella & Dot challenge in my everyday life. How did I style Stella & Dot? 


Running Errands on a Saturday afternoon - Stella & Dot necklace - On the Mark


While doing homework -  Stella & Dot - Courage Bracelet 


Date night with the husband - Stella & Dot - Suzanne Cocktail Ring 


If my photos aren't enough to convince you, let me introduce you to Caroline, our local Stella & Dot rep here in Salt Lake City!

Meet Caroline Kirkman- Stylist with Stella & Dot. Stella and Dot, an Inc. 500 Fastest-Growing Company, is a San Francisco based social selling company that creates flexible entrepreneurial opportunities for women. Our boutique-style jewelry and accessories line is available exclusively through in-home Trunk Shows by Independent Stylists and online. Our one of a kind collections are designed by celebrated New York designers and featured in Gossip Girl, In Style and Lucky Magazine as well as on the wrists and necklines of today's hottest celebrities. The Today Show, Wall Street Journal and The New York Times have praised Stella & Dot for our innovative social shopping concept which brings together the best of ecommerce, social media, personal service and passionate earning to create the ultimate home based business for today's modern woman. Caroline is excited to be bringing the Stella and Dot brand to Utah! A note from her:


Hello Fans of This Workman’s Life! I am thrilled to be introducing you to Stella and Dot if you have not heard of us. We have some amazing things going on right now. April is autism awareness month and we have a collection out right now that benefits the HollyRod Foundation. We are aiming to raise some big numbers for this foundation and the pieces are great, make sure to check it out. We have also launched our fist bag collection this month! Great versatility and practical usage from all of our products. And Finally- our always amazing jewelry! We have everything from your basic delicates, pops of color to your statement pieces. Scarves and candles are available too and make great gifts.Make sure to shop here: www.stelladot.com/carolinekirkman. You can also reach me there to book a show as well” XOXO Caroline Kirkman


Good luck and happy shopping!

Wednesday, April 24, 2013

Aunt Carebear's 30th Birthday


Aunt Carebear turned thirty last week. In her honor, we threw her a big Carebear Party! 
She purchased t-shirts for all the kiddos that said "my aunt spoils me rotten". They all wore them there.


We had Cake, Ice cream, hugs, kisses, frosting mustaches, and smiles. HAPPY BIRTHDAY CARRIE!
We're so glad you get to be Little Dude's Aunt!

Monday, April 22, 2013

Mani Monday: French Tip Glitter

Mani Monday? Yes, it has been awhile. I took a couple of weeks off from blogging so I could catch up on my other priorities. But today we are back and rockin' a lovely Monday Manicure!

I call this the Glitter French Tip. It took forever to achieve, but I LOVE it and it isn't too bright or over the top, meaning I can rock this at work.

How to do it:
Take a chunky glitter color, and paint only your tips. I actually used three layers of the chunky glitter. Let each layer dry well before adding the next layer.

I used Revlon Quick Finish's Happy Birthday. I use it for a LOT of different mani's. If you don't have one like it, go get it. It was $2 at Wal-Mart.

Once dried, take a white or silver glitter, and paint the whole nail. I used China Glaze for this one Let dry.

Add a clear coat to cover it and let dry, then go rock your mani!

I love this Mani. It's bright, and crazy, but subtle enough that you can rock it anywhere without people going crazy. With work dress codes and such, the last thing I need is to be in trouble, so keeping within the guidelines AND having a cute mani is huge for me!

What are you rocking today?


Friday, April 19, 2013

Greek Dinner; Gyro Chicken, Tzatziki sauce and Naan Bread

Are you ready for my most complex recipe yet? I can guarantee you'll love this one!
Inspired and Based off of the recipe HERE.
I adjusted the recipe based on what we had and what we could do with our allergies, likes, etc.


What You'll Need: (Consider this your grocery list)
Greek Chicken:
2 Medium Lemons (Cut into Wedges)
1/2 c veggie oil
2 tsp salt
1/2 tsp pepper
3 lbs chicken breasts

Tzatziki Sauce:
1 1/2 c plain yogurt
1/4 cup cucumber (grated)
1/4 tsp salt
1 tbsp olive oil
1 1/2 tsp vinegar

Naan Flatbread
3 cups flour
1 tsp salt
1/2 tsp active dry or instant yeast
1 1/2 c milk
1 tsp sugar
3-4 tsp butter

This recipe is actually kind of complicated, which is why I am very proud I didn't mess it up at all! You'll want to do this all in three steps. 

Step One: Prep

Cut your lemons into wedges. In a large ziploc bag, you'll want to add all the ingredients for the chicken, except the chicken. Before adding the lemons, you'll want to squeeze all the juice out. Add the lemon skins to the bag as well. Close the bag and shake well, and then add your chicken (full breasts or diced like I did, either way will work. Place in the fridge for 2 hours, turning the bag occasionally (I did it every 30 mins).

To prep your sauce, quite literally add all the items into a bowl and stir well. I did mine to taste, adding salt and cucumber as needed. Place sauce in a container with a lid and place in the fridge to keep cool.

To prep the bread,  pour the milk into a microwave safe bowl and warm it for about 1 min and 30 seconds. Add your sugar and yeast and let it sit for about five minutes to activate the yeast. Pour the mixture into a large bowl and add salt and 2/12 cups flour. Mix well by hand (or by mixer) until a dough has formed. Add flour until the dough no longer sticks to the side of the bowl.
In a separate bowl, grease lightly, add the dough and cover with clear plastic wrap. I sprayed the plastic wrap with cooking spray as well. Let sit for 2 hours covered at room temperature. 

Step Two: Cooking Prep

On a separate baking sheet/cutting board/tray, take your bread and cut into 12 small sections and roll into balls. Let each ball sit for another 30 minutes. They'll rest better if you keep them seperate from each other, instead of allowing them to touch. Pre-heat your oven for baking at 450.

Remove the chicken from the bag onto a grill or skillet. Discard bag and cook at medium to high heat. This should take about 10-15 minutes.


Step Three: Let's REALLY cook now!
On a baking sheet, take one or two of your dough balls and spread them out evenly with your fingers. Imagine them as if they're mini pizza dough, if you will. Lay on baking sheet and cook for 2-4 minutes. I baked them on one side for two minutes, flipped them and allowed them to cook for another two minutes.
Once cooked, remove from oven and brush butter on them. Stack on top of each other and cover with a towel.
Cook your chicken until it is well cooked, golden brown. Drain any extra juices or grease. Set aside to cool.
Remove your sauce from the fridge and prep your Gyros, placing the sauce on the Naan bread and adding the chicken. Roll if you can (I had to use a toothpick to keep them rolled together). 


Serve and Enjoy!

Thursday, April 18, 2013

When the World Kicks You Down {A Playlist}

It should come as no surprise to anyone when we all say this week sucked. It did. It sucked for everyone.
I use music to cope with my anxiety and depression. Music helps me let my mind wander. It helps me feel the raw emotion in the sound and release my true emotions about the subject or problem at hand. Music is what helped me survive when I needed it the most.
And this week I needed it, so I created the playlist for this week. Click on the links to each song, sit back, and let the music take you away. . .

Carry On.
How to Save a Life.
Black Balloon.
Broken.
Angels on the Moon.
Heaven.
Livin' on a Prayer

Enjoy.

xoxo-D

Monday, April 15, 2013

A Challenge

The TV is off. Social media? Only what I set it to see. I've got my music on, and am buried deep writing letters to friends and loved ones...

And I want to issue a challenge to my blog readers...
Send as many letters as you are old to friends and loved ones. Tell them thank you. Apologize. Tell them you love them. Send them via e-mail, snail mail, facebook or twitter. Just TELL THEM.
And then ask them to pass it on.

We all need a little bit more love, respect, and kindness in the world... and the only ones that can change the world is us. Why not start NOW?

Friday, April 12, 2013

Priorities

This last week was my birthday.
And I didn't take a single photo. 

I was busy being in the moment. I told others if they wanted to take photos, then to go for it, but that otherwise, we would be having fun and enjoying each other. And I didn't really miss it all that much. 

Over the weekend we had General Conference. While the men attended priesthood session, us girls wandered downtown SLC and enjoyed talking, walking, and being away from our duties and priorities. It was a fantastic weekend. 
I created a blog for my wards Relief Society even. 

And now, as Monday draws to a close I have nothing to write for you guys besides whats above. My mani for mani Monday is chipped from cleaning my home today and playing with the little one. My new shoes are wet from the rain today. My home is a mess thanks to a certain adorable 14 month old. 

And I don't care one little bit.

You read it all the time on blogs. People reevaluate their lives and decide to start edging out blogging. While that may not be the case, it is on the bottom of my to-do list. 

Many bloggers are worried about losing followers when GFC goes away. Frankly, I don't know if I even care. If you follow me on BlogLovin, I'm there. If not, e-mail or bookmark. I'm not going to beg you to follow me. If you do, thats fine, and I appreciate the show of support and love. If not, I wont lose sleep over it.

What I'm saying, in short, is that there are bigger things in life than my blog right now. If I have the time, or if I chose to make the time, you will see me. And you'll probably see many more family posts if anything. But I am really tired of putting myself on a deadline for no apparent reason. I do too much with my life to make myself stressed with more stress than needs be.

Please don't read this wrong. This isn't a goodbye post. This is a reevaluation of my life, my priorities, and what I consider important to us and our family. 

Mexican Lasagna


I wanted to make something different, so I took to the interwebs in search of a great recipe that my husband might like. I came across this one, and with his nod of approval, took to the kitchen. 

Here's what you'll need:
1 lb ground beef
1 packet taco seasoning
1 can tomatoes (diced)
1 tablespoon ketchup
1/2 can water
Tortillas
Cheese (I didn't measure how much)
1 can black beans
1 can corn

How to do it:
1. Brown your beef in a skillet on the stovetop. Add taco seasoning and cook well. Once cooked, add tomatoes, ketchup and water. Let simmer, stirring well. 
2. While that is simmering, layer tortillas in a baking dish, making sure to cover the entire bottom. I used Corn Tortillas instead of flour tortillas, they're thicker, so the lasagna wouldn't collapse when removed from the dish. 
3. While your skillet is still simmering, mix a can of corn, a can of beans and a handful of cheese in a bowl. Add a layer to the top of the tortillas in the dish.
4. Your skillet should be simmered by now, add a layer of the mix to the top of the bean and corn mix. Top with a layer of tortillas again and repeat mixture til your baking dish is full.
5. Once you reach the top layer, add cheese. I actually used a small amount of shredded cheese before deciding to use cheese slices instead, layering them until it was all covered. 
6. Cook at 400 for 35-40 minutes. To avoid overflow/spills in the oven, place a baking sheet on the rack below your lasagna to catch anything that may flow out. 
7. Let sit for about 10-15 minutes to cool and harden (to keep its shape). Cut servings, remove, and enjoy!


Friday, April 5, 2013

Sweet and Sour Chicken


We're doing a challenge here at the Workman house. We're trying to do our best to eat our way through my Pinterest boards before trying anything new. This also prevents us from eating out, and challenges my cooking skills. We take turns picking the meals, and this recipe was Bubba's pick.
(This is no shocker if you know the man.) 

What you'll need: 
3 chicken breasts
1 cup cornstarch
2 eggs
1/3 cup oil

Thaw your chicken breasts. Cut into small pieces. I found the original recipe called for one inch pieces, I did a tiny bit smaller and regretted it. Honestly, you could do it in big strips (think chicken fingers) and it probably would be all the same. Discard any fat. 

Dip the chicken breasts into the cornstarch. Coat well, dipping it on both sides.
I cut my pieces, tossed it all in the cornstarch and then shook it really well. This method was pretty quick, easy, and fairly mess-less.

In a separate bowl, beat your two eggs. Dip the chicken in the eggs after dipping it in the cornstarch. Add oil to a large skillet on stovetop and cook chicken well.  My chicken looked really egg-like during this step and I sincerely thought I messed up the recipe. Trust me on this one, keep going. You didn't mess it up.


Once cooked, place in a large baking sheet. Prepare your sauce mix. 

Mix 3/4 cups sugar, 4 tablespoons ketchup, 1 tablespoon soy sauce, and 1/2 cup white distilled vinegar. Stir well, and then pour over chicken. Stir chicken to coat all sides. If you have extra sauce, you did it right. (And I say that because it will sweeten while it cooks to make it PERFECT!)

Cook in the oven at 350 for 15 minutes. Stir, and return to oven for 15 more minutes. Once cooked, remove from oven, let sit for a moment to soak up the sweetness. Add your favorite mix-in's as appropriate, carrots, celery, or pineapple. 

Enjoy! 


Wednesday, April 3, 2013

Easter with the Workmans

The time around Easter is always a busy time for the Workmans. My mother in law, my nephew, my sister in law and I all have birthdays within a few weeks of each other, and then the holidays, St. Patricks Day and Easter. We love it, and we love being able to celebrate with each other. These are the photos from our Easter party together. 


Bubba took this one. I just love it. 


Helping little dude dye his eggs. 


My nephew had a blast coloring eggs.


Little dude coloring his fingers in the process.


Two of my nephews and my sister-in-law.


Grandma wanted a turn coloring eggs with little dude.


And like Grandmas do, she let him get messy!


He loved it.


Little dude and my nephew, Wyatt. Brayden would NOT stop hugging him. They had so much fun together!


Easter egg hunt indoors! (It snowed that morning. No egg hunting for us outside!)


Once he got the hang of it, he was trouble!


Mommy and a semi-cranky little dude.


Opening his eggs to see whats inside!


Happy Easter!


Grandma's face! We got her charms for her grandbaby necklace. I just adore this picture because of the face alone!


All the boys worked together to put together Masons tricycle that he got for his birthday. Nothing like a little male bonding!
Happy Easter!

Monday, April 1, 2013

Mani Monday {Revisited}: Map Nails


A year ago now I posted the first post on how to do Map Nails yourself. Looking back, I have no idea why so many people like the photo, share the link and the image and re-pin it on Pinterest. The image is embarrassing  I've been wanting to do them again and I was so excited to do a revisit of this tutorial for you!

You'll be using a white or nude colored nail polish. In the original post, I did an off-white shade. For this set I used a very bright white. I advise two coats and letting them dry well. 

Before you start your process of transferring the map image onto your nail, you'll want to cut out your squares ahead of time. I have an Atlas I purchased for $1 at Target last year that I use for my crafts. Find something cheap -they transfer much easier than older road maps. 

Just like with other nails with transferring images, you'll be using rubbing alcohol. Last time, I used a q-tip (or ten) and some patience. This time I tried a different route and used a craft paintbrush (a pack of 10 is $2 at Hobby Lobby) and used that to dip into the rubbing alcohol. Paint your nail well with it, and soak the paper, and use the end of the paintbrush to press the image down well on your nail. 

I placed a towel below my hand to absorb all of the rubbing alcohol. It worked quite well, because when you remove the image from your nail, you'll want to dry the image completely. 

The big trick is to paint your nail with a clear coat as soon as possible, trapping in the color. When the image is dry, it'll look pretty light and hard to make out. If you add a clear coat ASAP, it'll brighten it up, as well as dry it and finish the nail quicker. 


Once completely finished, you can actually go back and "edit" your nails, so to speak by re-adding map print to areas that didn't show up were or just aren't populated on the map. 

The best part about this manicure is that they last FOREVER. Last time I did these, I had a newborn, and they lasted nearly a month! I've had these on my nails a few days now, where usually I'd see chips, scratches or it'd be gone by now, these are looking great still. 

Good luck, and happy mapping!